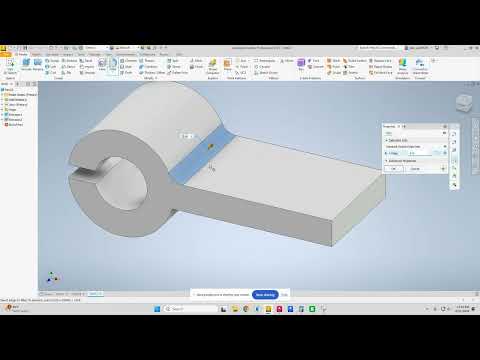
Parametric modeling is the backbone of modern 3D mechanical design, allowing engineers and designers to create adaptable, fully customizable models. In this guide, we take a deep dive into Chapter 5 of our modeling series: designing a precision Autodesk Inventor Hinge Guide. Whether you are a beginner or looking to refine your CAD workflow, mastering mechanical components like hinge guides is essential for real-world manufacturing projects.
Why Parametric Modeling Matters
Parametric modeling relies on parameters, geometric constraints, and dimensional relationships to define a 3D object. Unlike traditional direct editing, modifying a single dimension automatically updates all connected features across your part. By utilizing Autodesk Inventor, designers can build robust digital prototypes that adapt instantly to changing project requirements. This approach drastically reduces design iteration time and minimizes costly errors during manufacturing.
Step-by-Step Breakdown: Creating the Hinge Guide
Designing a functional Hinge Guide requires precision and a well-structured workflow. Here is a look at the core steps involved in crafting this model:
- Base Sketch & Geometric Constraints: Start with a clean 2D sketch defining the primary profile of the hinge guide. Always apply geometric constraints (such as perpendicularity and symmetry) before adding numerical dimensions.
- Extrusion & Feature Creation: Convert your 2D geometry into a solid 3D body using the Extrude tool. Add secondary features such as mounting holes, pin channels, and alignment slots.
- Parametric Formulas: Link critical dimensions using named equations, ensuring that adjustments to overall component length or pin clearance update related features automatically.
- Finishing Details: Apply fillets and chamfers to relieve stress concentration areas, ensuring the hinge guide achieves a polished, production-ready finish.
Best Practices for Clean CAD Modeling
To get the most out of your 3D design workspace, always ensure your 2D sketches are fully constrained before creating features. Additionally, naming your critical parameters (for example, Hinge_Pin_Diameter instead of relying on default variable names) makes future design modifications intuitive for both you and your team members.
Conclusion
Mastering fundamental mechanical parts like the Hinge Guide provides a solid foundation for more complex CAD assemblies. Leveraging industry-leading tools like Autodesk software enables you to transform engineering ideas into efficient, accurate digital models. Start practicing these parametric techniques today to streamline your design process!


