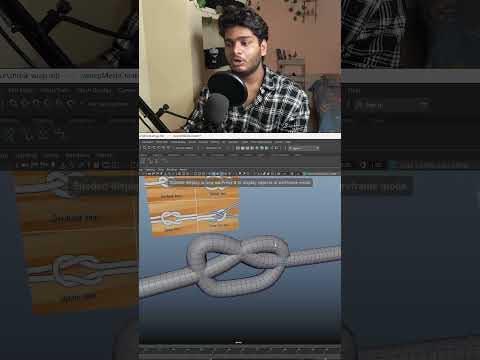
Creating complex 3D assets like twisted ropes and knots can often feel intimidating, especially when aiming for clean, game-ready topology. Fortunately, Autodesk Maya provides a powerful suite of tools that simplifies this process into a few quick steps. In this tutorial summary, we will explore how to effortlessly model a high-quality rope knot using curves, the Sweep Mesh tool, and the Shrink Wrap deformer.
Step 1: Defining the Knot Path with Curves
The foundation of any good procedural mesh starts with a precise path. Instead of extruding faces manually along a complex shape, start by drawing a curve that represents the core trajectory of your rope. Using Maya’s curve tools allows you to tweak the flow, overlap, and tension of the knot without worrying about geometry density early on.
Step 2: Instant Geometry with Sweep Mesh
Once your curve is properly placed, it’s time to generate the 3D volume. Utilizing the built-in features of Autodesk Maya, select your curve and apply the Sweep Mesh node. This powerful tool instantly converts 1D curves into clean 3D topology. You can easily adjust the profile type to create a multi-strand twisted pattern, tweak the radius, and control edge loop density to keep the asset optimized for real-time game engines.
Step 3: Conforming Tight Knots with Shrink Wrap
To make the knot look realistic and sit snugly against secondary surfaces, leverage the Shrink Wrap deformer. By wrapping your newly generated rope geometry onto a target mesh, you achieve a tight, convincing fit without manual vertex pulling. This deformer saves crucial production time while keeping the underlying geometry non-destructive and easy to edit.
Final Thoughts
By combining curves, Sweep Mesh, and deformers, you can create game-ready ropes and knots in just a few minutes. Mastering these built-in Autodesk workflow tricks will dramatically improve your 3D modeling speed and topology quality. Give these techniques a try in your next project!


