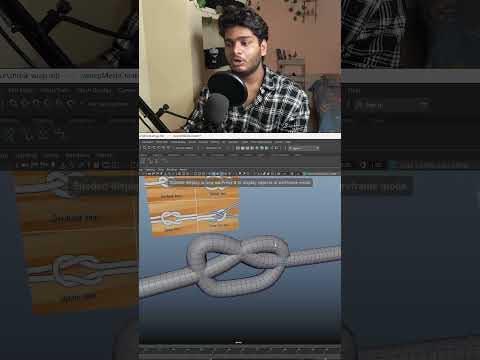
Modeling realistic, organic objects like rope knots can often feel like a daunting task for 3D artists. However, with the right workflow in Autodesk Maya, you can create clean, game-ready assets in just a few minutes. Whether you are working on a nautical scene or adding intricate detail to a character’s gear, mastering the combination of curves and modern procedural tools is a game-changer for your pipeline.
Step 1: Laying the Path with Curves
The foundation of any high-quality rope model starts with a clean curve. Instead of trying to extrude cylinders manually or manipulate edge loops, use the CV Curve Tool to draw the path of your knot. This approach allows for maximum flexibility; you can easily tweak the control points to ensure the "flow" of the rope looks natural. This step is crucial for achieving that "hand-tied" look that adds realism to your environment.
Step 2: Generating Geometry with Sweep Mesh
Once your curve path is finalized, it’s time to add volume. In modern versions of Autodesk Maya, the Sweep Mesh tool has revolutionized how we handle curve-based geometry. By selecting your curve and activating Sweep Mesh, the software instantly generates a procedural mesh along the path.
The beauty of this tool lies in its attribute editor. You can adjust the number of sides to keep the polycount low for game engine optimization or increase it for high-end cinematic renders. Furthermore, you can use the "Twist" and "Taper" settings to mimic the appearance of braided strands without having to model every single fiber by hand.
Step 3: Achieving a Tight Fit with Shrink Wrap
To make a knot look convincing, it needs to appear as though it is actually interacting with the object it is tied around. This is where the Shrink Wrap deformer becomes your best friend. By applying this deformer to your rope mesh and setting the underlying prop as the target, you can "wrap" the rope tightly against the surface. This eliminates unsightly gaps and ensures the knot looks secure and physically plausible.
Conclusion: A Professional Pipeline
By combining these three simple steps—Curves, Sweep Mesh, and Shrink Wrap—you can produce professional-grade props that are perfectly optimized. Utilizing the powerful toolset within Autodesk Maya not only saves you hours of manual labor but also ensures your topology remains clean and easy to unwrap. Give this workflow a try on your next project to see just how efficient your 3D modeling can be!


