000

Index Labels

The Poolroom

.

The Poolroom

Figure 1 : Poolroom Pool Table

The poolroom was my first attempt at creating a truly rich environmental experience with Stingray. Most architectural visualization scenes you see are antiseptically clean and uncomfortably modern. I wanted to break away from that. I wanted an environment I would feel at home with, not one that a movie star would buy for sheer resale value to another movie star. I also wanted the challenge of working with natural and texturally rich materials. Not white on white, as is generally the case.

Figure : Poolroom Clock

To this end, I started looking for cozy but luxurious spaces on google and eventually came across a nice reference photo I could work with. Warm rich woods, lots of games, a bar, and well... those all speak to me. For better or worse, I felt this room was one I would personally feel comfortable in. So I took on the challenge of re-creating that environment in 3D inside Stingray.

The challenges


The poolroom gave me some major challenges. Some I knew would be trouble from the start, but some I didn’t realize until I started rendering lightmaps. Most of my difficulties came down to handling materials properly.

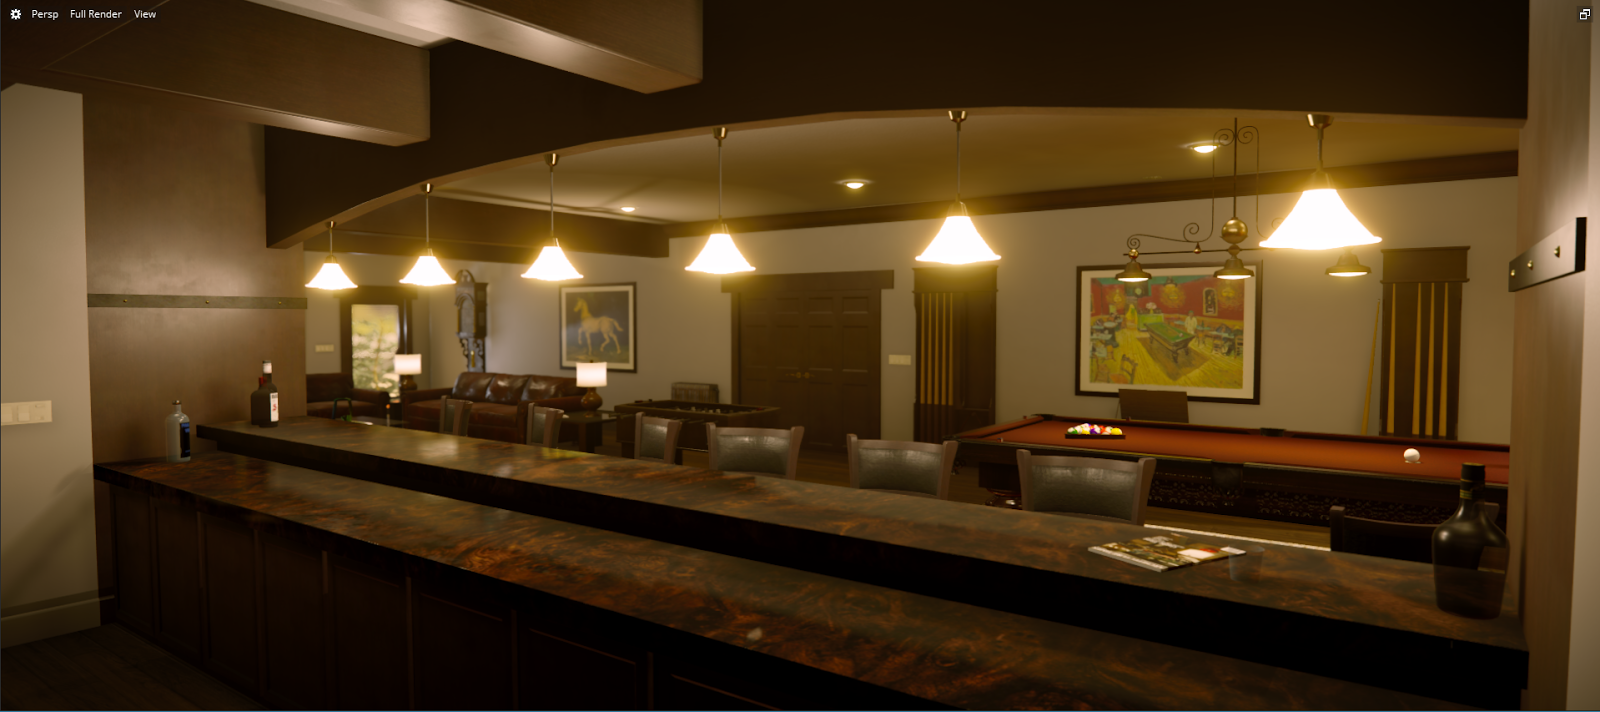
Figure 3 : Poolroom Bar

Coming to grips with physically based shaders

In addition to being my first complete Arch-Viz scene in Stingray, this was also my first real stab at using physically based shading (PBS). Although physically based shading is similar in many regards to traditional texturing, it has its own set of tricks and gotchas. I actually had to re-do the scenes materials more than once as I learned the proper way to do things.

For example, my scene was predominantly dark woods. With dark woods, you really have to be sure you get the albedo material in the correct luminosity range or you end up with difficulties when you light the scene. In my first attempts, I found my light being just eaten up by the darkness of the wood’s color map. I kept cranking up the light Intensities, but this would flood the scene and lead to harsh and broken light bakes.

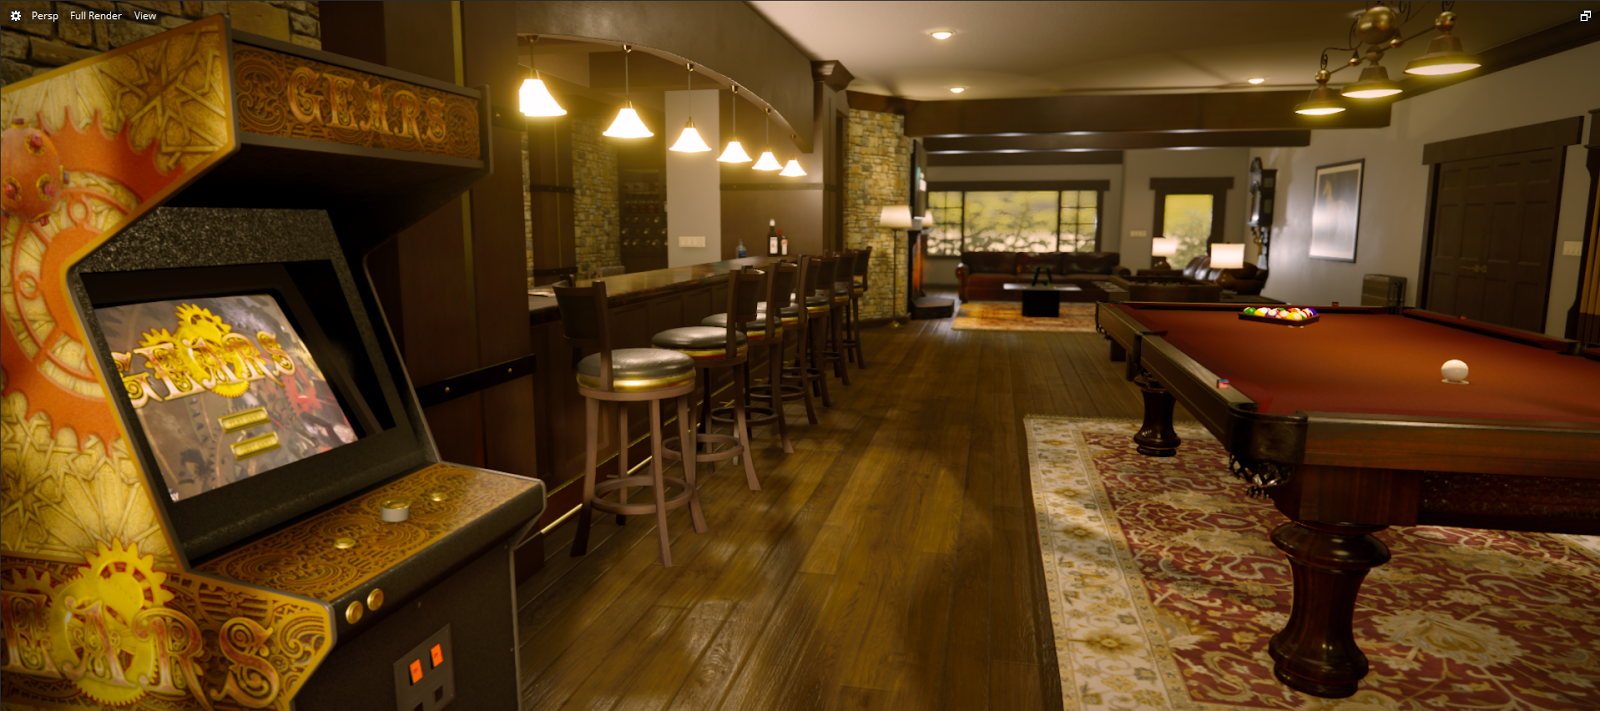
Figure 4 : Arcade Game/p>

Eventually, once I understood the effect of the color map’s luminosity and got the values in line, I started getting great results with normalized light intensities. My lighting began responding favorably with deep, rich lightmap bakes. When you get the physical properties of the materials right, Stingray’s light baker is both fast and very good. But I can’t stress enough: with PBS, you must ensure that your luminosity values are accurate.

Reference photo was HDR

When I was building out the scene and trying to mimic the reference photo’s lighting, I realized that the original image was made using some high-dynamic range techniques. I couldn’t seem to get the same level of exposure and visual detail in the shadowed areas of my scene.

Figure 5 : Before Ambient Fills

Figure 6 : After Ambient Fills

Because of this, I had to do some pretty fun trickery with my scene lighting. In the end, I got it by placing some subtle, non-shadow casting lights in key areas to bring up the brightness a little in those areas.

Figure 6 : Soft Controlled Lighting

All in all, the scene took a lot of lighting work to get just right. I have to say that I was very happy with how closely I was able to match the lighting, given that the original photo was HDR.

Lived-in but not dirty

The last big challenge was also related to materials. I had to find that fine balance of a room that is clean and tidy but also obviously lived-in. So often I find Arch-Viz work feels unnaturally smooth and clean, which can destroy the belief of the space. I really wanted my scene to break through the uncanny valley and feel real.

I handled this mostly by creating some very simple grunge maps, and applying them to the roughness maps using a simple custom shader. This was easy to build in Stingray’s node-based shader graph:

Figure 8 : Simple RMA style shader with tiling and grunge map with adjustment.

I have this shader set up so I can control the tiling of the color map, normals and other textures. The grunge map, on the other hand, is sampled using UV coordinates from the lightmap channel. This helps to hide the tiling over large areas like the walls, because the grunge value that gets multiplied in to the roughness is always different each time the other textures repeat.

Balancing the grunge properly was the biggest challenge here, but in the end, some still shots even get me doing a double-take. When that happens, I know I’m doing well. I also posted progress along the way on my Facebook page — when I had friends saying, “whoa, when can I come visit?” I knew I was nailing it.

3D modeling


Figure 9 : Record Player Model in Maya LT

I don’t have much that’s special to say about the 3D modeling process. I simply modeled all my assets the same way anyone would. Attention to detail is really the trick, and making sure that I created hand-made lightmap UVs for every object was critical to ensure the best light baking. Otherwise it was just simple modeling.

Figure 10 : Poolroom Model in MayaLT

One thing to note, however, is that I only used 3D tools that came with the Stingray package, except for Substance Designer and a little Photoshop. I did the entire scene’s modeling in MayaLT. Sometimes people think cheap is not good, but I believe this proves otherwise. MayaLT is incredible. I am super happy with the results and speed at which you can work with it. Best of all, it’s part of the package, so no additional costs.

Material design


Laying out the materials in the scene was pretty straightforward for the most part. At one point, I experimented with using more species of wood, but the different parts of the room started to feel disconnected. I started removing materials from my list, and eventually when I ended up with only a small handful the room came together as you see it.

Figure 11 : Record Player Material Design in Substance

I guess something else I should mention is performance shaders. Stingray comes with a great, flexible standard shader, but I wanted to eke out every little bit of performance I could on this scene while keeping the quality very high. Without much trouble, I created a library of my own purpose-built shaders (like the one mentioned earlier). I used these for various tasks. Simple colors, RMA (roughness-metallic-ambient occlusion), RMA-tiling shaders and a few others came together really quickly. From this handful of shaders, I was able to increase performance while simplifying my design process. I find it comforting how Stingray deals with shaders… it is just very easy to iterate and save a version. Much better usability than other systems I have tried.

Figure 12 : Shader Library

Fun stuff


Well, most game dev is hard work, the fun is at the end when you get to finally relax and see your efforts paid off. But there were definitely some really fun parts of making the poolroom.

One was the clock. It’s a small, almost easter-egg kind of thing, but I programmed the clock fully. Meaning, its hands move, the pendulum swings, and it also rings the hour. So if you are exploring the poolroom and it happens to be when the hour changes in your system clock, the clock in the game rings the hour for you. So two o’clock rings two times,  four o’clock rings four times, etc. The half-hour always strikes once. I modeled the clock after one that my father gave me, so I put some extra love into it. It is basically exactly the clock that hangs in my living room.

Figure 13 : Clock Model in MayaLT

Figure 14 : Clock Model in Stingray

I also gave the record player some extra attention, because my good friend Mathew Harwood was kind enough to do all the audio for the project. I felt the music really set the scene, and he even worked on it over my twitch stream so we could get feedback from some people who were watching. So yeah, press +or - in the game to start and stop the record player, complete with animated tone arm. Nothing super crazy, just a nice little touch.

Figure 15 : Record Player in Stingray

Community effort


One thing I found really neat about this project was that I streamed the entire creation process on my Twitch channel. I have never streamed much before this project, but it made the process much more fun. I had people to talk with, and often my viewers were helpful to me in suggesting ideas and noticing things I had not noticed. It was very collaborative and a great learning exercise for me and for my viewers. We got to learn from each other, which is the dream!

For example, the record player likely would not have been done to the level I did it had one of my viewers not pushed me to make a really detailed player. Because of this push, it ended up being a focus of the level, and even has some animation and basic controls a user can interact with.

Stop by my Twitch channel sometime at twitch.tv/paulkind3d and say hi, I’d love to meet you.

Blog Archive

Labels

.NET Programming 2D Drafting 3D Animation 3D Art 3D Artist 3D design 3D effects 3D Engineering 3D Materials 3D Modeling 3D models 3D presentation 3D Printing 3D rendering 3D scanning 3D scene 3D simulation 3D Sketch Inventor 3D Texturing 3D visualization 3D Web App 3ds Max 4D Simulation ACC Adaptive Clearing adaptive components Add-in Development Additive Manufacturing Advanced CAD features Advanced Modeling AEC Technology AEC Tools affordable Autodesk tools AI AI animation AI Assistance AI collaboration AI Design AI Design Tools AI Experts AI for Revit AI Guide AI in CAD AI in CNC AI in design AI in Manufacturing AI in Revit AI insights AI lighting AI rigging AI Tips AI Tools AI troubleshooting AI workflow AI-assisted AI-assisted rendering AI-enhanced Animation animation pipeline animation tips Animation workflow annotation AR architectural design architectural modeling architectural preservation architectural visualization Architecture architecture design Architecture Engineering Architecture Firm Architecture Productivity architecture software architecture technology Architecture Workflow Arnold Renderer Arnold Shader Artificial Intelligence As-Built Model Asset Management augmented reality AutoCAD AutoCAD advice AutoCAD API AutoCAD Basics AutoCAD Beginner AutoCAD Beginners AutoCAD Civil 3D AutoCAD Civil3D AutoCAD commands AutoCAD efficiency AutoCAD Expert Advice AutoCAD features AutoCAD File Management AutoCAD Layer AutoCAD Layers AutoCAD learning AutoCAD print settings AutoCAD productivity AutoCAD Teaching AutoCAD Techniques AutoCAD tips AutoCAD tools AutoCAD training. AutoCAD tricks AutoCAD Tutorial AutoCAD workflow AutoCAD Xref Autodesk Autodesk 2025 Autodesk 2026 Autodesk 3ds Max Autodesk AI Autodesk AI Tools Autodesk Alias Autodesk AutoCAD Autodesk BIM Autodesk BIM 360 Autodesk Certification Autodesk Civil 3D Autodesk Cloud Autodesk community forums Autodesk Construction Cloud Autodesk Docs Autodesk Dynamo Autodesk features Autodesk for Education Autodesk Forge Autodesk FormIt Autodesk Fusion Autodesk Fusion 360 Autodesk help Autodesk InfraWorks Autodesk Inventor Autodesk Inventor Frame Generator Autodesk Inventor iLogic Autodesk Knowledge Network Autodesk License Autodesk Maya Autodesk mistakes Autodesk Navisworks Autodesk news Autodesk plugins Autodesk productivity Autodesk Recap Autodesk resources Autodesk Revit Autodesk Software Autodesk support ecosystem Autodesk Takeoff Autodesk Tips Autodesk training Autodesk tutorials Autodesk update Autodesk Upgrade Autodesk Vault Autodesk Video Autodesk Viewer Automated Design Automation Automation Tutorial automotive design automotive visualization Backup Basic Commands Basics Batch Plot Beginner Beginner Tips beginner tutorial beginners guide Big Data BIM BIM 360 BIM Challenges BIM collaboration BIM Compliance BIM Coordination BIM Data BIM Design BIM Efficiency BIM for Infrastructure BIM Implementation BIM Library BIM Management BIM modeling BIM software BIM Standards BIM technology BIM tools BIM Trends BIM workflow Block Editor Block Management Block Organization Building Design Software Building Maintenance building modeling Building Systems Building Technology ByLayer CAD CAD API CAD assembly CAD Automation CAD Blocks CAD CAM CAD commands CAD comparison CAD Customization CAD Data Management CAD Design CAD errors CAD Evolution CAD File Size Reduction CAD Integration CAD Learning CAD line thickness CAD management CAD Migration CAD mistakes CAD modeling CAD Optimization CAD plugins CAD Productivity CAD Rendering CAD Security CAD Skills CAD software CAD software 2026 CAD software training CAD standards CAD technology CAD Tips CAD Tools CAD tricks CAD Tutorial CAD workflow CAM car design software Case Study CEO Guide CGI design Character Rig cinematic lighting Civil 3D Civil 3D hidden gems Civil 3D productivity Civil 3D tips civil design software civil engineering Civil engineering software Clash Detection Class-A surfacing clean CAD file cleaning command client engagement Cloud CAD Cloud Collaboration Cloud design platform Cloud Engineering Cloud Management Cloud Storage Cloud-First CNC CNC machining collaboration command abbreviations Complex Renovation concept car conceptual workflow Connected Design construction Construction Analytics Construction Automation Construction BIM Construction Cloud Construction Planning Construction Scheduling Construction Technology contractor tools Contractor Workflow Contraints corridor design Cost Effective Design cost estimation Create resizable blocks Creative Teams CTB STB Custom visual styles Cutting Parameters Cybersecurity Data Backup data management Data Protection Data Reference Data Security Data Shortcut Design Automation Design Career Design Collaboration Design Comparison Design Coordination design efficiency Design Engineering Design Hacks Design Innovation design optimization Design Options design productivity design review Design Rules design software design software tips Design Technology design tips Design Tools Design Workflow design-to-construction Designer Designer Tools Digital Art Digital Assets Digital Construction Digital Construction Technology Digital Content Digital Design Digital engineering digital fabrication Digital Manufacturing digital marketing digital takeoff Digital Thread Digital Tools Digital Transformation Digital Twin Digital Twins digital workflow dimension dimensioning Disaster Recovery drafting Drafting Efficiency Drafting Shortcuts Drafting Standards Drafting Tips Drawing Drawing Automation drawing tips Dref Dynamic Block Dynamic Block AutoCAD Dynamic Blocks Dynamic doors Dynamic windows Dynamo Dynamo automation early stage design eco design editing commands Electrical Systems Emerging Features Energy Analysis energy efficiency Engineering Engineering Automation engineering data Engineering Design Engineering Innovation Engineering Productivity Engineering Skills engineering software Engineering Technology engineering tools Engineering Tools 2025 Engineering Workflow Excel Export Workflow Express Tools External Reference facial animation Facial Rigging Facility Management Families Fast Structural Design Field Documentation File Optimization File Recovery Flame flange tips flat pattern Forge Development Forge Viewer FreeCAD Fusion 360 Fusion 360 API Fusion 360 tutorial Future of Design Future Skills Game Development Gamification Generative Design Geospatial Data GIS Global design teams global illumination grading optimization green building Green Technology Grips Handoff HDRI health check Healthcare Facilities heavy CAD file Heavy CAD Files heritage building conservation hidden commands Hospital Design HVAC HVAC Design Tools HVAC Engineering Hydraulic Modeling IK/FK iLogic Import Workflow Industry 4.0 Infrastructure infrastructure design Infrastructure Monitoring Infrastructure Planning Infrastructure Technology InfraWorks innovation Insight intelligent modeling Interactive Design interactive presentation Interior Design Inventor Inventor API Inventor Drawing Template Inventor Frame Generator Inventor Graphics Issues Inventor IDW Inventor Tips Inventor Tutorial IoT ISO 19650 joints Keyboard Shortcuts keyframe animation Keyframe generation Landscape Design Large Projects Laser Scan Layer Management Layer Organization Learn AutoCAD Legacy CAD Licensing light techniques Lighting and shading Lighting Techniques Linked Models Machine Learning Machine Learning in CAD Machine Optimization Machining Efficiency maintenance command Management manufacturing Manufacturing Innovation Manufacturing Technology Mapping Technology marketing visuals Material Creation Maya Maya character animation Maya lighting Maya Shader Maya Tips Maya tutorial measurement Mechanical Design Mechanical Engineering Media & Entertainment MEP Modeling Mesh-to-BIM Metal Structure modal analysis Model Management Model Optimization Modeling Secrets Modular Housing Motion capture motion graphics motion simulation MotionBuilder Multi Office Workflow Multi-User Environment multileader Navisworks Navisworks Best Practices Net Zero Design ObjectARX .NET API Open Source CAD Organization OVERKILL OVERKILL AutoCAD Page Setup Palette Parametric Components parametric design parametric family Parametric Modeling particle effects particle systems PDF PDM system Personal Brand Phasing PlanGrid Plot Settings Plot Style Plot Style AutoCAD Plotting Plugin Tutorial Plumbing Design point cloud Portfolio Post Construction Post-Processing Practice Drawing preconstruction workflow predictive analysis predictive animation Predictive Maintenance Predictive rigging Prefabrication Presentation-ready visuals Printing Printing Quality Procedural animation procedural motion Procedural Rig Procedural Textures Product Design Product Development product lifecycle product rendering Productivity productivity tools Professional 3D design Professional CAD Professional Drawings professional printing Professional Tips Project Documentation project efficiency project management Project Management Tools Project Visualization PTC Creo PURGE PURGE AutoCAD Rail Transit Rapid Prototyping realistic rendering ReCap Redshift Shader reduce CAD file size Render Render Passes Render Quality Render Settings Rendering rendering engine Rendering Engines Rendering Optimization rendering software Rendering Tips Rendering Workflow RenderMan Renewable Energy Renovation Project Renovation Workflow Reports Resizable Block restoration workflow Revit Revit add-ins Revit API Revit automation Revit Best Practices Revit Collaboration Revit Documentation Revit Family Revit integration Revit MEP Revit Performance Revit Phasing Revit Plugins Revit Scripting Revit skills Revit Standards Revit Template Revit Tips Revit tutorial Revit Workflow Ribbon Rigging robotics ROI Scale Autodesk Schedules screen Sculpting Secure Collaboration Sensor Data Shader Networks Sheet Metal Design Sheet Metal Tricks Sheet Set Manager shortcut keys Shortcuts Siemens NX Simulation simulation tools Sketch Sketching Tricks Small Firms Smart Architecture Smart Block Smart Building Design Smart City Smart Design Smart Engineering Smart Factory Smart Infrastructur Software Compliance software ecosystem Software Management Software Trends software troubleshooting Software Update Solar Energy Solar Panels SolidWorks Startup Design static stress Steel Structure Design Structural Optimization subscription model Subscription Value Surface Modeling sustainability sustainable design Sustainable Manufacturing system performance T-Spline team training guide Technical Drawing technical support Template Setup text style Texture Mapping Texturing thermal analysis Time Management time saving tools Title Blocks toolbar Toolpath Optimization Toolpaths Topography Troubleshooting Tutorial Tutorials urban planning User Interface (UI) UV Mapping UV Unwrap V-Ray Vault Best Practices Vault Lifecycle Vault Mistakes Vector Plotting vehicle modeling VFX Viewport configuration Virtual Environments virtual reality visual effects visualization workflow VR VR Tools VRED Water Infrastructure Water Management Weight Painting What’s New in Autodesk Wind Energy Wind Turbines Workbook workflow Workflow Automation workflow efficiency Workflow Optimization Workflow Tips Worksets Worksharing Workspace XLS Xref Xrefs เขียนแบบ